Reader Stephanie offered to send me a no fail bread idea when she heard of my failed attempts at bread making! I, of course, said yes. I think this bread would be a great addition to your Easter dinner. And apparently, you can’t fail at it! That’s the best news I have heard all day.
No Fail Bread
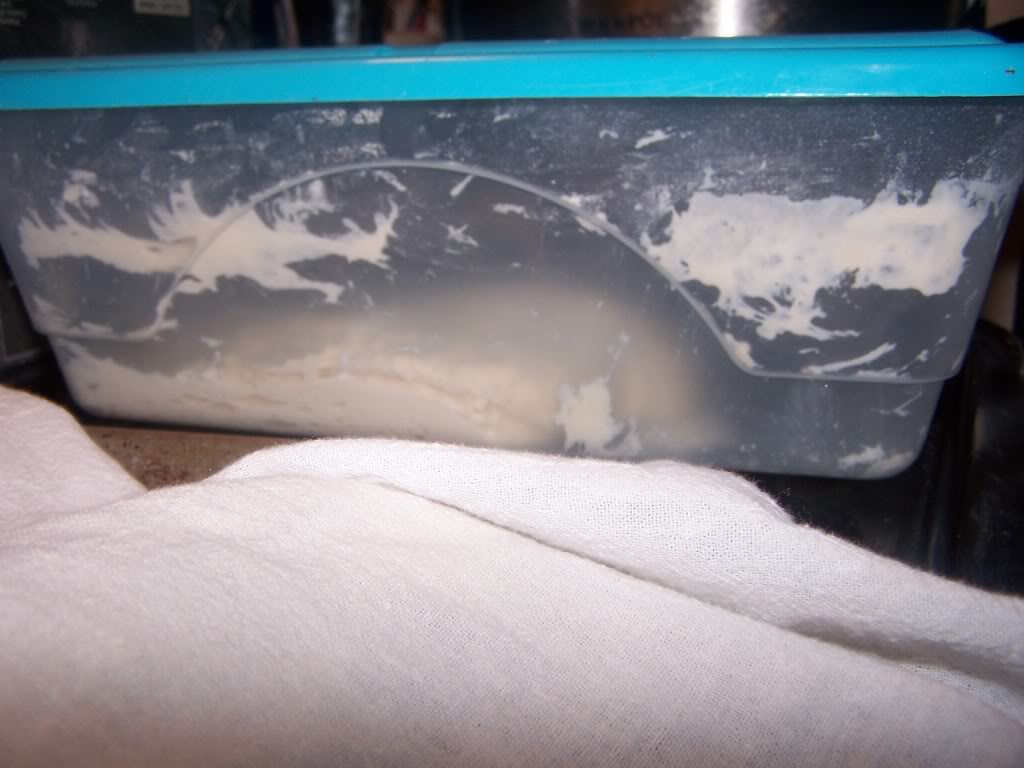
I love bread. And I love to bake bread. I’ve been baking bread for years. I love the smell of bread rising and even more once it comes out of the oven. But, let’s be practical, hauling out the stand mixer to bake bread everyday – or even once a week – isn’t likely to happen in my house. I had to get a bit creative this winter, too, due to our incredible weather. My kitchen was so cold that I might as well have been putting bread in the fridge to rise – which, of course, you can do but it generally takes overnight. I read somewhere that you could let your bread rise in your crockpot [heat your crockpot covered on HIGH for 5 mins then unplug and put your dough inside] and this did work well. But I still had the hassle of making the dough. Then I read about Artisan Bread in Five Minutes a Day: The Discovery That Revolutionizes Home Baking and I gave it a try. The gist of this method is that you put the bread ingredients into a bucket, let it rise at room temperature for a couple of hours, then put the bucket in the refrigerator until you’re ready to use it. The initial measuring and stiring takes around five minutes the first day. So, you really just throw flour and stuff in a bucket? Yep! You can buy dough proofing buckets from King Arthur Flour or off Amazon and these will work and last forever but they’ll cost you almost $2o. When I started this I wasn’t willing to invest that in case I failed. That’s when I found that the bakery in my neighborhood sells the buckets that the icing comes in once they’re done. I bought one and it works great although it does take up a significant portion of my fridge. This bucket is actually big enough for a double recipe! My new ‘bucket’ that I’m using is actually a plastic shoe box that I found at the dollar store. Not only is it the perfect size but it fits perfectly on the bottom shelf of my fridge. So, my total expenditure for dough buckets has been $3.50.

How much time does it take to have great bread each day? It might take a bit more than five minutes with the dough but not much. When you are ready for bread you pull your bucket out of the fridge, dust the top of the dough with flour, grab the size of dough you need [depending on loaf you’re making], and then you fold the edges under to activate the gluten and shape your loaf. The book does an amazing job of going through each step and providing different bread recipes that will just make your mouth water. Personally, I’ve had better luck with the master recipe. My sandwich bread and Brioche recipe were totally delicious but not the most attractive loaves of bread but in the no fail bread mantra, I’ll try again and next time use a bit more flour when I shape the loaves. The dough needs to rest to come to room temperature a bit then you put it in the oven.  My bread is not as ‘artisan crusty’ as the pictures in the book or the website and that’s because I don’t use steam or a pizza stone as suggested only because I don’t care for overly crusty loaves. Just know that you can bake the bread to be as crusty as you prefer. This master recipe works just as well in a loaf pan, too. I did it as boules today because smaller loaves take less time to bake and I was using the counter top convection oven to save energy. However, some of the breads will require a loaf pan – like the brioche. What do I like best about Artisan Bread in
  Five Minutes a Day? I love that even my ugly loaves of bread tasted wonderful! I also love that the bread recipes work for so many things. The master recipe makes boule bread, baguettes, pizza, fancy pain d’Epi, sandwich loaf, bruschetta, dinner rolls, calzones, stromboli, focaccia, and pita. Many of the other bread recipes can also do double, or triple duty, in other recipes. I love this kind of thing! It’s perfect for busy people and means that even if you don’t have the ‘right’ kind of dough in the fridge there’s still a chance that it’ll work for you.
  What kind of bread did I make today? This is boule from the Master Recipe. I made 3 small loaves to take to a community dinner. I still have enough dough left in my bucket for us to have a couple of pizzas later this week for dinner and isn’t that a Cool Idea!
About Stephanie
Stephanie lives with her family in Richmond, VA and blogs about living smart, being accountable and funny things her kids say at What A Cool Idea!
10 Comments
Join the discussionI have ABin5 and I love the idea, but I’m not accustomed to how they measure their flour. They dip the measuring cup into the flour and then level off the top with a knife. I’m used to using a scoop to pour flour into my measuring cup and then leveling. Their method yields more flour per cup than mine (5 oz vs 4.25 oz). I’ve tried to measure their way several times, but I can’t get it right, so my doughs are too wet.However, last time I weighed my flour per their conversion on their website (http://www.artisanbreadinfive…. and it worked perfectly.My favorite recipe out of ABin5 thus far has got to be the Challah. It has eggs and butter, so it’s not hard and crusty which makes it great for a 3-year-old. I like sweet dinner rolls, so this is perfect for me as a roll or braided. I’ve even used it for pizza dough.One thing I’ve learned is that my kitchen is on the cool side, so I have to let my dough warm up for longer than 40 minutes before baking. The dough doesn’t rise a lot, but it definitely shouldn’t feel cold anymore when you put it in the oven. If it’s still cold, let it rest longer.
Mmmm. I love the artisan bread method. The ciabatta is SO good.
Sounds great I might give a it try. Think that $1 bin is food safe plastic?
Love this recipe! I’ve been making it for a few years now. I recently made the brioche dough and OH MY WORD!! Outstanding!I bake my master recipe bread in my enamel covered cast iron pot. Just throw the pot in when heating up the oven. Throw the rested dough in, bake with top on for 20 minutes and with top off for another 15-20 minutes. Crusty bread without the water pan!I would be careful with the plastic dollar store bins. You should use a food grade container. I bought a Rubbermaid one at Wal Mart for $5-$7. Well worth the investment!
@amy- I find that my dough is wet, too. I thought it was just me:) Or maybe my arm is just too tired and I put in more water to get the dough mixed. Either way it tastes delicious.
@laura – it may not be. it was a test to see if it was the right size. i know my ‘icing bucket’ is and that’s the one I use most. I’ve now gone back and gotten a ‘half size’ bucket from my bakery. not only does it fit in the fridge better but it doesn’t allow as much air in contact with the dough.
I saw this yesterday, bought the book, baked the bread today, loved it so much, I got more baking stuff so that I can make more. Including 2 bins for 2 master recipes, a bread stone, a pizza peel among other things. I cannot rave enough about this bread!
That is great to hear! So glad this post was helpful, can’t wait to try it myself!
I have this book as well but haven’t tried anything in it yet. I don’t have much room in the fridge so a bucket would never fit. What size Rubbermaid did you get? Can you give me a link? Something long and flat would work well in my fridge.Thank you!
When you are talking about the Rubbermaid plastic container are you talking about the “take an toss” type that I buy to take things when I might not get them back? 🙂
They fit well in the fridge and are air tight and I always have them. Would that work?
Thanks for this post ! Keep It Up posting posts like that