**This post is part of the Get Real series. Please remember that this is meant as a learning community. We know that many of you are passionate about what you do and we want you to express that, just please do so in a way that will be an encouragement and aid to others making a transition. We want this to be a “safe space” for participants to learn. For that reason, we reserve the right to delete any comments that are not handled in this manner.
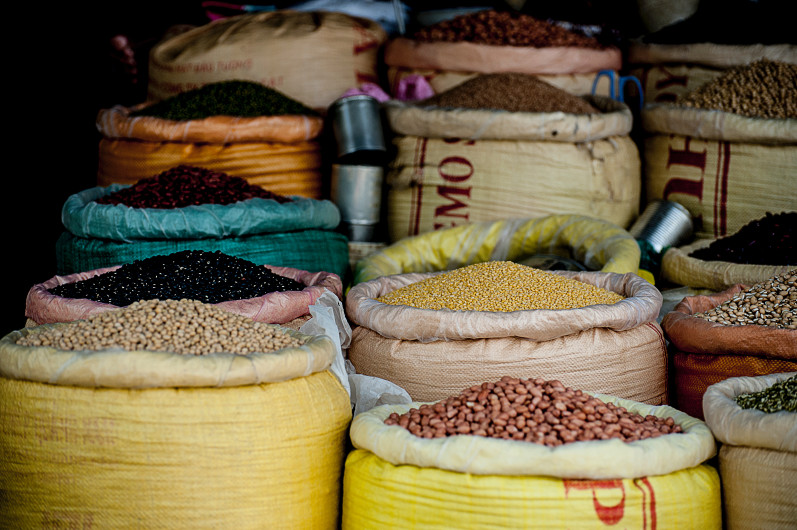
Hopefully, last week’s beany post inspired you to get cooking with beans. At the grocery store, you may have been presented with a dilemma: dry or canned beans? Like “paper or plastic,” it’s an age-old question. (Not really.) Here’s a little exploration of the pros and cons of each:
DRY BEANS
Advantages:
- Less money
- In control of ALL ingredients
- Long soak unlocks all the nutrients/health benefits
- Less packaging waste
- Avoid BPA in cans
- Option to “toss in a bit more” in many recipes
Disadvantages:
- More work (slightly)
- Must pre-plan
CANNED BEANS
Advantages:
- Quick and easy!
- Most sources, other than the traditional foods paradigm, say canned beans are just fine nutritionally (unlike most canned foods, like vegetables)
Disadvantages:
- Higher cost
- Conservative sources say manufacturers’ method of cooking makes them less nutritious, both in proteins and nutrients
- Might have added preservatives/salt
- More waste (cans)
- Exposure to BPA in cans
Whether you choose canned beans, dry beans, or a blend of both depending on your time, energy, and preparation foresight, beans are a frugal and nourishing choice.
My Choice
I default to dry beans almost 100% of the time these days. Using them can be simple, especially if you cook large batches and freeze the extras for those days that you haven’t pre-planned a meal. To price compare dry beans to canned, assume that you’ll get about 5-7 cups of cooked beans from one pound of dry. A can is about 1 ½-2 cups of beans. That means a one-pound bag will equal about 3-4 cans. I recommend checking value grocery stores like Aldi or Save-a-Lot for the best prices on both dry and canned beans, but be sure to also watch the sales at your regular grocery store and try bulk purchases or mail orders.
How to Soak and Cook Dry Beans
1. Measure and Rinse Dry Legumes
Decide the number of dry beans you need to cook. I highly recommend cooking in bulk, one to two pounds at a time, and simply using what you need for a recipe and freezing the remainder. Most recipes you find call for either a can (about 1 ¾ cups cooked beans) or give the cooked measurements. Rinse the dry beans in a colander thoroughly under cool water while sorting through them for any stones or other debris. I’ve actually found a pebble and clumps of dirt before, so don’t skip this step any more than you would eat the lettuce from your garden without washing it. I also toss out any strange-looking or overly wrinkly beans. I don’t trust them. If you’re using lentils, mung beans, or split peas, it’s possible to skip the soaking and cook them dry. However, if you want to really maximize your nutrition, include the next step anyway: soaking.
2. Soaking Dry Beans and Legumes
All dry beans and legumes, even though those mentioned above that can be cooked without a soak, should be soaked before cooking. Soaking shortens the cooking time and makes the beans more digestible. To soak, cover the washed beans with four times their volume of water. The optimal soaking temperature is 140F, but I usually just use my hottest tap water.
Note: I don’t usually use hot tap water for cooking because of possible leaching in the pipes or hot water heater. However, this is the one place I’m often lazy. You might simply heat water in a teapot, but not to boiling. Blend with cold water if you get it too hot.
Choose one of these soaking techniques:
- Nourishing soak: Soak for 12-24 hours. The long soak is the healthier method and makes the beans more digestible. I write in my calendar to “soak beans” in the morning, then the following morning “cook beans” for dinner that night.
- Normal soak: Leave the beans to soak for 4-8 hours or overnight.
- Quick soak: (Less healthy, but works in a pinch) Bring the beans to a boil for one minute, cover, and let sit for one hour. I always soak right in the pot I’ll use to cook the beans, which is often the pot I’ll use for the final bean recipe. Why wash more dishes than necessary? You’ll want to cover the pot while they soak if there’s a chance of bugs or debris falling in, but in the winter I often leave the lid off out of laziness with no repercussions.
An option to reduce flatulence: It is said that if you pour off the water mid-soak and replace it with fresh water, you can cut down on the flatulence sometimes blamed on beans and legumes. Using the traditional Mexican herb epazote is also said to help in this area.
3. Cooking Dry Beans and Legumes
Nourishing Cook (with soaking technique 1)
Drain, rinse and return the beans to the pot. Add water to cover beans twice as deep. Bring to a gentle boil and skim off any foam that appears. Reduce heat and simmer, covered, for 4-8 hours until soft. (It is said that simmering for the first hour or so uncovered may reduce “wind.”) This is the method I use regularly.
It is very important to note that a simmer for dry beans is a different beast than the “low heat” you want for something like rice. I cook beans somewhere between level 2 and 4 on my gas range’s normal burner or about 2 on my larger “power” burner (5 is dead center). You don’t need to see a rolling boil the whole time, but if steam is rising, that’s a good sign that the water is hot enough. I put the lid on after the first hour or so (or the whole time if I’m not going to be around), and that really changes things. You might only want level 1-2 on your burner so that your water isn’t bubbling away too furiously. I always plan to start cooking the beans in the morning after breakfast, because it’s okay if they’re finished a little early. They’ll wait for dinnertime just fine with the heat off, drained or undrained. If I don’t have time in the morning or forget, I always figure the last possible chance is by the end of lunch or about 1:00. That way I know they’ll be ready by dinner prep time. I do leave beans cooking on the stove when I’m out of the house, but that’s certainly a choice to make at your own discretion.
Normal Cook (with soaking techniques 2 and 3)
You have the choice of cooking in the soak water (more nutrients) or draining, rinsing, and adding new water (less flatulence). Whether reusing soaking water or adding fresh, there should be twice as much water as beans. Boil furiously, uncovered, for ten minutes. Cover, lower heat, and simmer for 1-2 hours, until tender.
Note: this is the conventional way to cook beans often found on a bag of dry beans. It is NOT the method I use or recommend.
Troubleshooting:
Unbelievably, some beans can cook for 8 hours and still be crunchy, which is very frustrating. Sometimes I throw up my hands, not wishing to risk failure, and just boil furiously for 10 minutes at the beginning of the cooking. If I’m patient enough, I remember to simply keep the temp at medium-low or so and check in before it’s dinnertime and too late for a high boil intervention, only if necessary. If your beans are crunchy after 4-8 hours, add a pinch of baking soda to the water (it will foam up), or just crank up that heat and they’ll eventually get done! The one comfort in this process is that you can’t burn them or irreparably mess them up!
Note: Beans that struggle to cook may split and look less than desirable for cold bean salads, but you can always use them in soups.
The bonus element of cooking with dry beans is that although you have to address them the night before and during the day, when you’re actually ready to cook and feeling the dinner hour crunch, the dry beans are cooked and ready to go and you don’t have to do anything to them.
Storing Cooked Beans
I cook at least a whole pound of dry beans and then freeze the leftovers in 1 1/2-2 cup servings for future recipes. My favorite containers are either glass pint jars, glass peanut butter jars, or plastic tubs from 16 oz. cottage cheese or sour cream. This is the perfect size for “one can” of beans. Of course, cool before putting into plastic containers, if using. Leave a little headroom before freezing, but it’s not of utmost importance since there isn’t liquid to expand.
Cooked beans can also survive in the fridge for about one week awaiting another recipe or for use in cold salads. If you leave them too long, believe me, you’ll KNOW when they get bad! This post is mostly excerpted from The Everything Beans Book. Use the code OAMMREAL to get 25% off the rest of the book
 November Week 4 Action Item:
- Try cooking with dry beans if you’ve never done it before!
- If you have cooked with dry beans previously, make a big batch and challenge yourself to include beans in something three days in a row. Ideas include tossing beans into eggs, on top of cold salads, or into soups, stews, or stir fry where they don’t usually go. Spread refried beans on quesadillas or incorporate them into sauces, pureed.
April Get Real:
Please take a moment to thank our guest authors by clicking over to their sites and/or liking them on Facebook and/or Twitter.
Sponsor: Once A Month Mom
11 Comments
Join the discussiontried the healthy version with beans for the first time, using navy or white beans, would have been good to see a grid noting the differant times for differant sizes of beans. Didn’t need to soak 24 hrs and cooked up in about 40 min. Maybe I should have soaked less time?
Thank you for the feedback. Yes, you’ll notice the three different soak types – anywhere from 4-24 hours. Enjoy!
Very helpful, thank you.
It’s our pleasure!
Thank you for this information. I am trying my best to stay away from any canned foods, so now I can add dried beans to my list.
Thanks for sharing. I wonder if the nutrition of the dried beans may be a bit skewed since they may be uncooked when the nutrition is calculated. After they are cooked they would most likely be less nutritious then the label specifies.
I use a pressure cooker … no soaking and in 35 – 45 mins, they are ready. I find canned beans, especially chickpeas, to have an inconsistent cookedness. Usually way too “al dente”.
I found a recipe “Beans w/o the blast” (true story).
dried beans (1 or 2 cups)
2 bay leaves
1 clove of garlic
water
cook for 35 – 45 minutes depending on the doneness you are after, and the bean … navy, turtle beans take less, chickpeas take longer.
Great flavor as well.
Oh nice! Thank you for sharing!
Can I use a crock pot?
Hi Saundra, You can most definitely use a crock pot to cook dried beans. You still need to soak them first, but you can cook them on the low or high setting. The time will vary depending on the type of bean.
guyThis is awesome. My family and I are use to eating healthy, avoiding anything that can cause cancer, so we rarely buy any canned food, vegetables. But black beans are a pain in the butt to cook. Maybe we will consider using slow cooker for this. Overall, great tips!