**This post is part of the Get Real series. Please remember that this is meant as a learning community. We know that many of you are passionate about what you do and we want you to express that – we ask that you please do so in a way that will be an encouragement and aid to others making a transition. We want this to be a “safe space” for participants to learn. For that reason, we reserve the right to delete any comments that are not handled in this manner.
The following is a guest post from Get Real Blog Partner, Rachel Tayse of Harmonious Homestead. It has been added to and updated Allie Garcia.
Harvesting fresh vegetables from my backyard is one of my greatest pleasures. But it’s not the only reason I grow edibles. I garden to save money on my grocery bills, explore life cycles and nature with my daughter, have an excuse to spend time exercising outdoors, and put fresh, nutrient-rich produce on the table.
Growing Basics
The basic edible gardening process is to plan, get dirty, and harvest. There are lots of opinions about how to do each of these things. I will take the beginner’s approach to keep it simple.
Plan
The first step to planning an edible garden is to evaluate your property. Whether you have a windowsill, patio, or whole backyard – spend a few days observing the sunlight, water, and pet/kid/hose access. The ideal garden location will have ample sunlight (8 hours a day minimum), consistent moisture, and accessibility while not being in the way of pets and people. You can look up your growing zone for additional clues to what will grow best.
You also will want to talk to family members/others in your household who will be involved about how much time and money you want to dedicate to the gardening project. At a minimum, edible gardens need seeds or seedlings, water, soil, and some attention. For better results, you may want to invest in some soil amendments, tools, containers, and staking materials. Scope out a local garden center or ask a friend with a garden how much they spend, knowing that the initial investment can be minimized by years of use.
If you are planning a big garden, now is a good time to test the soil for nutrients. Contact your local extension office for a lab in your location and expect to pay around $20 for a soil test. Extension agents are full of great information specific to your location so be sure to check out their offerings.
 Next is the exciting part. What do you want to grow? Or really, what do you want to eat? Seed packets will give you information about the sunlight and water needs of your favorite plants. Here are some best beginner bets:
- Little space and attention: Lettuces, greens, and radishes are the quickest and easiest crops to grow. They mature in a little over a month and can be grown in containers. A kid-friendly project is to plant a salad container garden that will mature into plants you can clip for a backyard fresh salad.
- Budget busters: Tomatoes, peppers, and eggplant are easy to grow in most of the US and they are the most expensive to buy at the farmer’s market. If you are looking for cost savings, growing these will shave the most off your produce bill. They do best planted in the ground with at least one square foot of space or in a container no smaller than a five-gallon bucket.
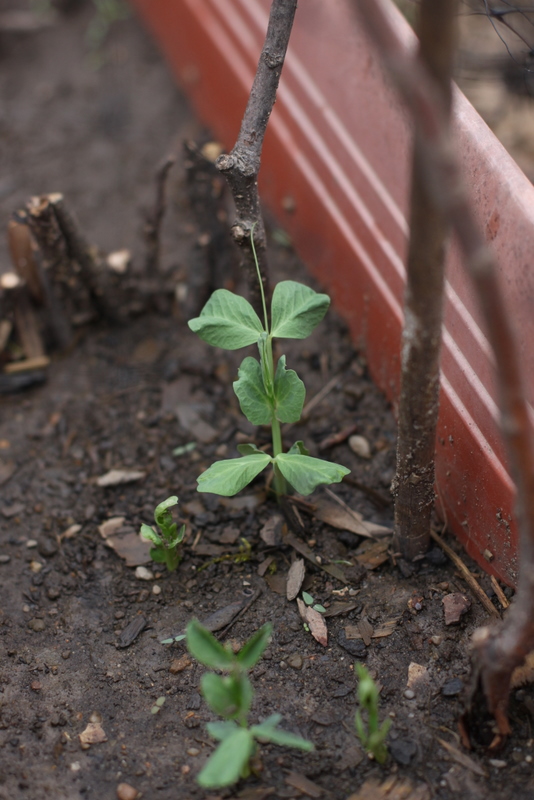
- Go vertical: Some vegetables like peas, beans, summer and winter squash, and cucumbers grow by sending out tendrils that attach to anything nearby. They easily grow along fences or up bamboo stake tee-pees. Plan ahead for this trellising behavior and take advantage of the fact that these veggies can grow up instead of taking up valuable bed space.
- Root down: Root vegetables like carrots, beets, and radishes are favorites of kids because they magically appear from the ground at harvest time. They are all cold hardy, which means they can be planted early in the spring for early summer harvest or in late summer for a late autumn harvest. Root vegetables need loamy (i.e. airy) soil. If yours is naturally clay-heavy, add in some peat moss and vermiculite to promote root growth. After sowing seeds directly in the soil, be sure to thin them after they sprout to one per inch or the roots will intertwine. Root vegetables have a ‘bonus’ crop too: their green leaves are edible!
- Year-round edibles: Many fresh herbs can grow year-round in the right conditions. Some are perennial in many areas, meaning they will come back each year (oregano, thyme, parsley, mint, chives) and others (rosemary, sage) can over-winter inside. All herbs can be grown in containers and grow replacement leaves after you harvest them.
- Sneak them in: Some homeowners have association guidelines that prevent gardening. While I do not advocate breaking rules, many edibles blend in well with the landscape. Chives and lavender are beautiful and tasty. Day lily, nasturtium, and redbud blossoms are all edible. Instead of ornamental kale or cabbage, try the edible varieties.
When you have decided on your plants, I recommend writing down your plan. You can use graph paper and be specific or just sketch your ideas of what will go where. This helps your family stay on the same track and is useful to reference in future years.
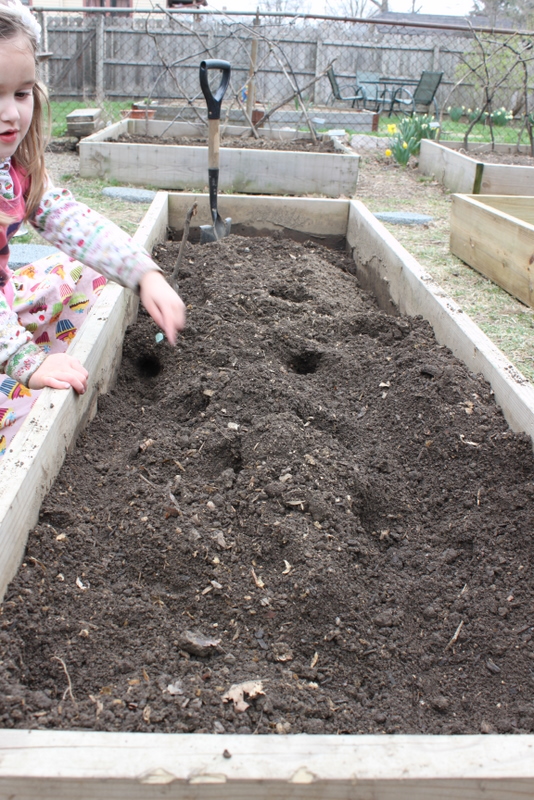
Get Dirty
With a plan in place, it’s time to dig! Kids love to help with this part of gardening. You can create a bed in a container by double digging the soil you have, or building raised mounds, or boxing in raised beds. Each method has advantages and disadvantages. At the foundation of any bed is healthy, weed-free soil.
If you did a soil test, use the results to add appropriate amendments. If not, I recommend a mix of peat moss and potting soil mixed into your existing ground or to fill containers. Compost and worm castings are great natural nutrient boosters.
Whether to buy seeds or starts (young plants) is a common question for beginners. Starts (or seedlings) are just plants that have jump-started their lifecycle by being started indoors under grow lights. Most plants, including lettuce, greens, peas, beans, squash, and cucumbers, are easy to sow seeds directly into the ground. I recommend that beginners buy seedlings of tomatoes, peppers, eggplant, cabbage, broccoli, cauliflower, and herbs as these are difficult to grow successfully by direct sowing. Consult the soil packet to determine when to plant. Many have a map on the back to relate to your location.
To maintain your plants, water when the soil is dry when you stick your thumb down an inch below the surface. Containers dry out quickly because they are more exposed to the air. To reduce water needs, plant the biggest containers you can and group them together. Many experienced gardeners add rain barrels or other water catchment to their yards to reduce strain on the local water treatment facility and save money.
Keep your soil free of weeds that take nutrients and water from the soil (meaning it’s not going to your plants). I prefer to hand-pull weeds. Many are actually edible themselves! Watch out for pests that might be damaging plants. Many bugs can be discouraged by spraying plants with a solution of 1 tablespoon liquid soap (like Dr. Bronner’s) to 1 quart water. Diatomaceous earth, a powder available at home and garden stores, effectively and naturally kills slugs and other crawling pests.
Harvest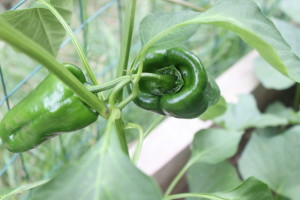
Finally, your garden will start to produce the leaves and fruits you want to eat! Lettuce, greens, broccoli, and herbs will all continue to grow after you harvest the leaves. Simply clip with scissors or gently pull off leaves with your hand and in a week you can harvest again.
Wash your leaves in a salad spinner and enjoy fresh or cooked. Broccoli, spinach, kale, chard can be blanched and frozen for future use. Herbs can be made into pesto with oil and frozen in ice cube trays. Peas and beans will also produce more delicious pods after you pull off the first batch. Again, enjoy these raw or cooked and blanche to freeze.
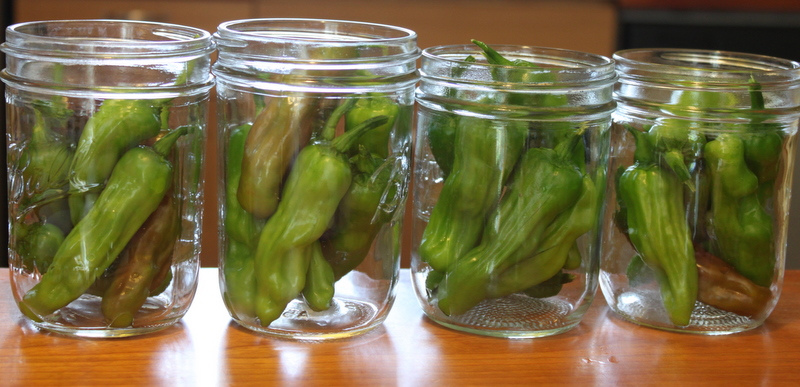
Harvest tomatoes, peppers, cucumbers, and summer squash as soon as they ripen. Many animals like raccoons, squirrels, and even dogs love to prey on these fruits. Keep tomatoes on the counter to preserve their texture and nutrients. The rest can last in the fridge in a loosely tied plastic sack for up to a week. Consult the National Center for Home Food Preservation for safe ways to can and preserve these summer favorites. (We will also be covering this topic in full in August as part of Get Real closer to harvest time.)
 Repeat
If the gardening bug bites you this year (and I hope it does!) you will want to grow again next year. Saving seeds is the traditional practice of gathering some seeds from your garden produce for the following year. Keeping seeds from your non-hybrid plants allows you to save money by reducing the seed cost.
Some common edibles take many nutrients from the soil that must be replenished before you plant them again. Most gardeners rotate tomatoes, eggplant, potatoes, and peppers to a new location every year because they are the heaviest depleters. Another natural tactic is to grow a cover crop of ground peas or vetch to fix nutrients in the soil over winter. Lettuce, greens, herbs are light nutrient users and can be planted again in the same location if desired. Peas and beans actually add nutrients to the soil and are good to plant after tomatoes, eggplant, etc. to renew the soil. Containers need to be refreshed with compost, worm castings, and/or new soil every year.
April Week 2 Action Item:
- This week’s challenge is to plan to plant something. In many parts of the country it is already safe to plant lettuces, radishes, peas, carrots, beets, and other cold-hearty seeds outside. My garden has mustard greens, lettuce, peas, radish, and perennial herbs growing already. Others will want to make a plan and start gathering supplies but wait for the frost-free date to begin planting. Whether you put seeds in soil or draw up your ideas, we would love to hear about your growth in the comments below or see your pictures on the Get Real facebook page!
 Rachel has more gardening details, including a week by week plan, in her Grow Your Garden free ebook.
 ![]() Rachel is a food educator in Columbus, Ohio. She cooks and teaches classes using local ingredients in from-scratch recipes. She preserves seasonal flavors by canning, infusing, dehydrating and freezing. Rachel lives with her husband, home educated six year old daughter, two dogs, and one backyard chicken. She writes about her urban homesteading life at Harmonious Homestead.
Rachel is a food educator in Columbus, Ohio. She cooks and teaches classes using local ingredients in from-scratch recipes. She preserves seasonal flavors by canning, infusing, dehydrating and freezing. Rachel lives with her husband, home educated six year old daughter, two dogs, and one backyard chicken. She writes about her urban homesteading life at Harmonious Homestead.
April Get Real:
Please take a moment to thank our guest authors by clicking over to their sites and/or liking them on Facebook and/or Twitter.
**This post contains affiliate links.