**This post is part of the Get Real series. Please remember that this is meant as a learning community. We know that many of you are passionate about what you do and we want you to express that, just please do so in a way that will be an encouragement and aid to others making a transition. We want this to be a “safe space” for participants to learn. For that reason, we reserve the right to delete any comments that are not handled in this manner.
Growing up we quite often had ravioli straight from the refrigerated section of the grocery store. They were quick and easy and heartier than just your basic spaghetti. As I grew older and my journey for whole and real foods evolved, that “fresh” grocery pasta was not what I wanted for myself or my family. Taking the time to make your own pasta is worth it and not to mention much more delicious.
Making Traditional Ravioli
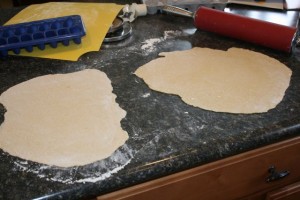
Making traditional ravioli is not as hard as it seems. You do not need a pasta maker or attachment to make good ravioli. First, whip up a basic pasta dough such as the one Kristen mentioned in last week’s challenge. Then roll it out into two separate halves.

Dough rolled out fairly thinly
Then make a filling of your choice! The filling is the best way to get creative. It can be cheesy, meaty, sweet, or savory! In fact, we have a few recipes here on the site that will work for ravioli fillings: Spinach Ricotta Stuffed Shells and Chicken Pesto Stuffed Shells. Here are a few sites that have a variety of easy fillings you can choose from Mangia Bene Pasta, Better Homes and Gardens, or get CREATIVE and make your own! I’ve been eliminating milk from my diet for my little one, so for me, it was fun to see what I could come up with.
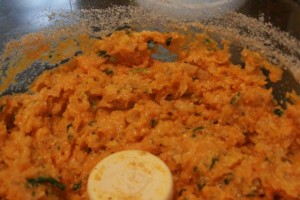
I went to the freezer and pulled out some roasted and pureed butternut squash I had stockpiled from my CSA this fall. I then sauteed some spinach, garlic, scallions, and onions with olive oil. Into the food processor it all went. I added some homemade bread crumbs to give it a thicker consistency.

My butternut squash creation
Next, I cut my portions of dough into rectangles (because I’m type A) and drew lines on them for how large I wanted my ravioli to be. I like my ravioli larger so I feel fancy like the nice Italian restaurants my husband and I love to go to. In the middle of each square, I put a tablespoon or so of filling.
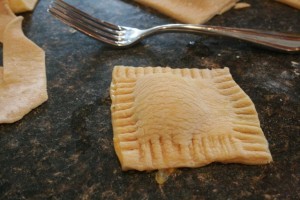
Then I create an egg wash (one egg with two tablespoons water) and brush the areas around the filling to help create the seal on the ravioli. Then carefully I place the second layer of dough on top and gently press down around the filling spots to create my first seal. Next, I cut the ravioli into individual pieces and with a fork I press down on the edges to make the final seal.

All sealed up!
Here’s the fun part and why you’re here on a freezer cooking site! You can either cook the ravioli immediately or place them on a sheet of wax paper and then into a freezer-safe bag or container and freeze until you are ready to use them! Simply bring a pot of water to a rolling boil, add a pinch of salt to the water and gently place 2-3 ravioli at a time into the pot. Cook until they are all floating at the top, approximately 5-7 minutes. Serve with your favorite marinara, pesto, or alfredo sauce. Or just drizzle with some olive oil and herbs as I did!

Ravioli ready to eat!
Making Non-Traditional Ravioli
Now as you’re reading this post some of you may be saying to yourself, “I didn’t get to the challenge last week, and I probably won’t get to it this week. Is there an even EASIER way to make homemade ravioli?” YES! Have you ever seen those wonton wrappers in your produce section? Beyond appetizers, eggrolls, and of course wontons, you can use them to make ravioli! They are light, airy, and not to mention already rolled out and the perfect shape for your homemade ravioli.
Simply make your filling as you choose. Then take out one wonton wrapper and put the filling in the center. Instead of an egg wash use 1 tablespoon cornstarch to 2 tablespoons water as your “glue”. Brush the edges with the cornstarch mixture, and press another wrapper on top. There you go! Another easy ravioli! Then just as above, bring a pot of water to a rolling boil, add a pinch of salt to the water and gently place 2-3 ravioli at a time into the pot. Cook until they are all floating at the top, approximately 5-7 minutes.
March Week Two Action Item:
- Make either a batch of traditional or nontraditional ravioli. Cook them fresh or freeze them for later in the week or another time.
- Then leave a comment below or on our Facebook Page about how they turned out and how you liked making them
March Get Real:
Please take a moment to thank our guest authors by clicking over to their sites and/or liking them on Facebook and/or Twitter.
Sponsor: Once A Month Mom – One pledged Get Real participant will be winning some pasta-making tools packet. ***This giveaway is now closed.***
Guest Author: Kristen of Dine & Dish
