Our typical freezer cooking instructions generally include some form of plastic freezer bag, plastic wrap, or foil pan. But we often have readers ask if they can use glass containers they already have. To help you out with our Better Than the Freezer Aisle series, we wanted to help answer some of your questions, such as reasons for using glass over plastic, what containers to choose, and what precautions you need to take.
Why Choose Glass?
1. Save Money – Glass containers may be an investment up front, but you will continue using them for years to come. Freezer bags tend to be a one and done deal (although they can be washed and re-used, they won’t last forever and will need to be replaced). So while plastic/foil may be an affordable option short term, the cost adds up over time.
2. Save Resources – Again, glass is reusable! If your family makes an effort to live green and reduce waste, then you probably don’t want to be throwing away 30 or more freezer bags per month.
3. Save your Health – Plastic is generally considered to be safe, but there is some debate about how safe it actually is. For example, you are probably aware of the ban on the use of BPA (an ingredient used in plastics that mimics hormonal properties) in baby bottles. Some sources caution consumers not to store certain foods or heat food in plastic containers due to the potential for chemicals and additives to leach out. As always, do your research and make your own call, but if you feel that plastic is not the best choice for your family, then keep reading to see how you can implement changes in your storage routine.
What Kind of Containers are Best?
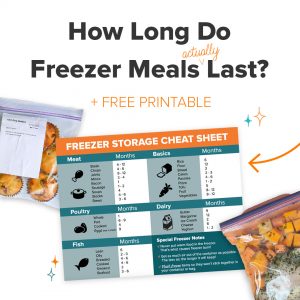
The container you use will vary based on the food you plan to store. This information comes from a post in our archives which details the best containers to use for different foods.
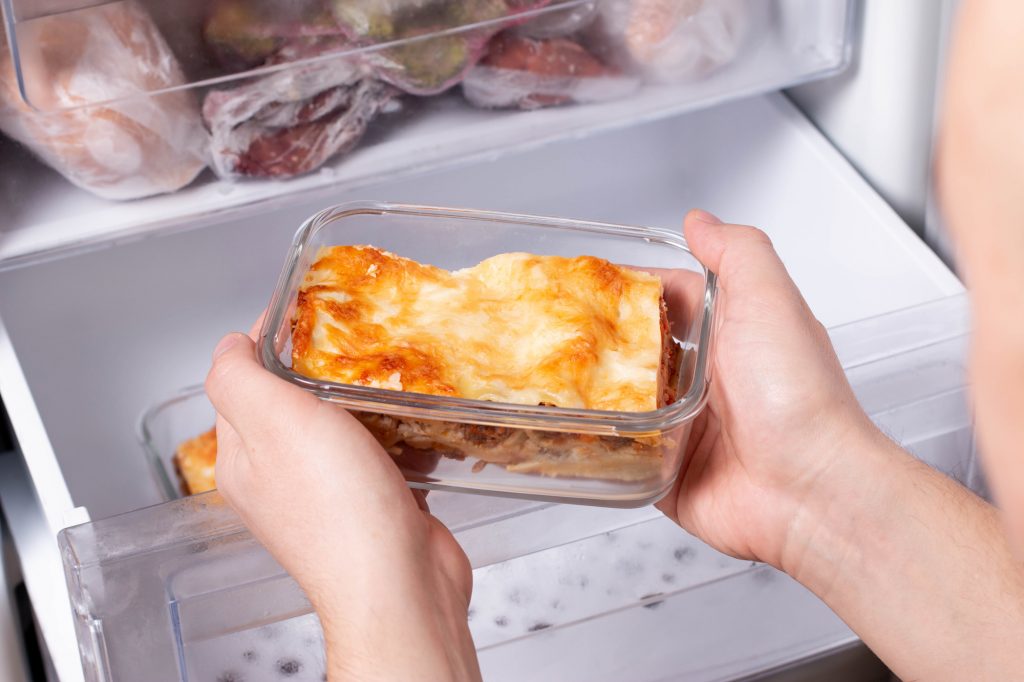
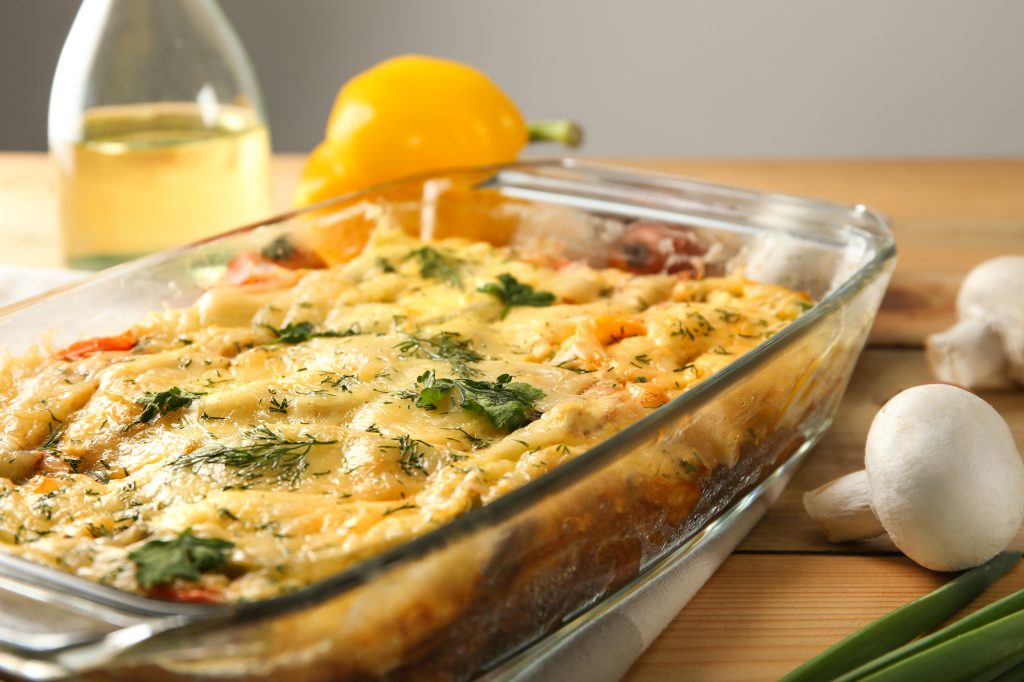
1. Glass Baking Dishes – If you are freezing a dish that will be baked on serving day, your best option is to freeze the food right in the baking dish. You can build up a stash of glass bakeware on the cheap at yard sales and thrift stores (also a green option as it keeps perfectly good merchandise out of landfills). If you don’t have the space for a large stash, you can line your bakeware with foil or plastic wrap, freeze your meal, and then remove it from the pan. On serving day, defrost your “brick” in the baking pan in which it will be baked.
Best used for meals that will be baked or cooked in the same container, such as a casserole.
2. Glass Storage Containers – I received a glass set similar to this as a gift. I trashed all my cheap plastic (which I’d been wanting to replace anyway) and have never looked back. These are easier to work with than baking dishes in that they come in a variety of sizes, you can write/erase with marker on the lid, and they’re easy to stack.
Best used for soups, marinated meat, meals that will be cooked or reheated in a different container (i.e. slow cooker or stovetop), or use smaller containers for individual lunch portions.
3. Mason Jars – These old fashioned gems are a work horse in the kitchen (not to mention quite trendy for photo styling and home decorating!) They are inexpensive to buy in bulk. But they can also be found for even less at yard sales and thrift stores. They can be used just like the storage containers mentioned above, but are probably best for storing liquids (soups, homemade broths, etc.) and individual lunch portions. They too come in a variety of sizes.
4. Fresh Menu Kitchen Reusable Bags – These containers are not glass, but they are a fantastic reusable freezer cooking option. The bags are made out of food safe PEVA plastic and can be easily cleaned with soap and hot water and reused. They are transparent so you can easily identify the contents, but you can also customize them with labels or markers. These are great for most types of foods, including liquids like soups, chilis, and marinades, and the different size options allow for storage of our individual breakfast or lunch recipes and dry items like breads, muffins, sandwiches, or ingredients like cooked rice, pasta, or flash frozen vegetables.
A Few Words of Caution
- Be sure to leave an inch or so of head space in your containers and jars. Remember that liquids and foods expand when they freeze and you don’t want to lose your container and your meal because they shattered in your freezer.
- Thaw and/or reheat very slowly! Glass is much more sensitive to temperature changes than plastic and can crack or shatter if exposed to extreme temperature changes. Do not try to bake a glass dish that has been frozen without letting it come to room temperature first. Your best bet is to defrost slowly overnight in the refrigerator.
- Finally, you may have noticed that glass is not as malleable as plastic freezer bags, and therefore will not stack and store as neatly or in as small a space as freezer bags do. Using glass containers works best if you have a large, extra freezer in which to store your freezer meals. But no matter what your freezer size, be sure to plan ahead and make sure you have adequate space for your containers before cooking.

22 Comments
Join the discussionI froze a bunch of soup in mason jars and leftover other jars I had around and so many of them cracked on me even with plenty of headspace. Is there anything I could have done wrong?
I’m betting it had something to do with temperature changes. For instance not cooling the soup before putting it in the freezer, trying to thaw too quickly, or something of that nature. You have to be much more careful about drastic temperature changes when it comes to glass.
Don’t screw the lids on! I’ve broken so many and thrown out so much broth, that now i just set the lid on top until its frozen, and then screw them on later. I’ve only had breaks in the freezer, I usually thaw on the counter, and then in a pot of room-temp (or a little warmer) water, and sometimes I’ll put the pot on the stove on low heat to thaw it faster once there is some liquid around the edges inside the jar.
Thanks for the tips Michelle! I use the plastic lids with my glass jars (that you buy separately) and haven’t had any break yet – knock on wood!
Thanks! I have lost so much broth, too. I have always cooled it on the counter, then put it in the fridge overnight, before freezing it, and even then I’ve lost some. I do notice the Kerr jars are more susceptible to cracking than Ball.
When freezing in jars you want to stick with straight sided jars. When you buy new jars the straight sided ones say.” Freezer safe”
I use mason jars. Be sure they are marked “freezer safe” by the manufacturer, leave plenty of headspace and leave the lids screwed on loosely until the contents are frozen. I also always make sure they are cold (refrigerated) before putting in the freezer. I have never had one of these jars break.
I agree. I always cool it down slowly and have yet to have one break for freezer storage. Dropping them is another issue entirely! Even still, they don’t always break on my tile. Tough little jars. 🙂
If we use jars to freeze food, can they be used in a microwave to thaw or will this break the glass?
Thanks.
Hi Emily, you don’t want to thaw them in the microwave. The most important part of working with glass is that it needs to thaw very slowly so as not to break it.
I freeze broth in glass jars and thaw in the microwave all the time. I also pour hot coffee or brew from the keurig over ice in jars all the time. I’ve yet to lose a jar to anything but kids and the dishwasher.
Hi Elaine, what brand of jar did you use? I’m having multiple surgeries soon and need to prep food before each (I’m the only cook in the house…lol) and am interested in using mason jars for soups.Thank you!
A helpful tip with glass casserole dishes. Not many people have enough glass casserole dishes to freeze and keep each of the meals in. I actually put a layer of plastic wrap down in the casserole dish (with some hanging off on all sides), spray it with your favorite non-stick spray. Make the casserole then flash freeze it in the dish. Once frozen, use the plastic wrap to lift the casserole out of the dish. Wrap it in freezer paper, then saran wrap then foil (or whatever way you want to store it). When you go to cook it, spray the dish and pop the frozen back in it and place in the refrigerator to defrost before baking.
I have two pyrex glass dishes and I love to use the Reynolds nonstick foil for casseroles and such. Sooo much easier to line the pan and freeze. Then clean up is next to nothing.
These are great ideas to help cut back on clean up time. Thanks for sharing!
I have really been struggling with the waste of all the plastic bags. The bags also were really disorganized in our chest freezer. I love the idea of the mason jars and how you can do quart size and half gallon size to correlate with the ziploc bag requirements.
Mason jars are a fantastic alternative to the plastic bags!
Hi Janie–yes me too! I really hate just tossing away the freezer bags! They’re so dirty I can’t even recycle them. But–I hope I found an alternative–on amazon I found some biodegradable freezer bags! They may not be exactly what I need–and I’m hoping they hold well for what I need–but I will feel so much better than just tossing the bags! Maybe you can try it too…(I have too small of a freezer to stack glassware…)
❤️
Hi everyone! I’m new here and just reading a lot to prepare for my first meal plan. I googled about freezing mason jars and found the resource below. I was especially interested to learn that Ball jars with shoulders ARE NOT freezer safe, but the Ball jars with no shoulders ARE freezer safe!
https://masonjars.com/can-you-freeze-mason-jars-at-a-glance-tips-for-freezing-your-food.html
Ball and Kerr jars have a freezer line so you are sure to leave enough headspace.
I recently froze a big batch of chicken soup in a jar with shoulders but I left a lot (like 1/4 of the jar) of headspace and it did not crack.
https://www.gardenbetty.com/how-to-safely-freeze-liquids-in-mason-jars/
Thanks Regina! This is helpful information! Thanks for passing it along!