How to Thaw Frozen Meals
One of the questions we hear the most is, “How do I actually eat my freezer meals once they are all cooked?”
Well, the simple answer is that it is really up to you! There are some simple tricks and tips for making efficient use of your freezer stash, and making sure your meals are thawed safely and ready to eat at dinner time.
Another comment we hear is, “I just don’t like freezer meals. The texture is always off,” or, “You can’t freeze foods with cheese/milk/potatoes/pasta, etc. That will taste gross when it thaws.”
We’re willing to bet this opinion in many cases is due to food that has been thawed improperly. There is a short list of things that we don’t freeze. And if you have taken a trip down the freezer aisle in the grocery store, you’ll notice the same thing there too.
The key is to follow the directions for thawing or cooking! Each of our meal plans comes with custom labels with detailed thawing instructions, but here are some general tips that you can apply in your kitchen.
Once you have your freezer stocked, how do you thaw meals and get them on the table to enjoy? Here are four methods for thawing freezer meals!
Posted by Once A Month Meals on Tuesday, January 17, 2017
Thaw Your Meals Safely
The following methods are safe for thawing freezer meals:
-
Refrigerator Thaw
The refrigerator is the safest place to thaw food. It will always stay well below the “danger zone” temperature where bacteria can start to grow. This method may take the longest amount of time, but it is the preferred method for thawing freezer meals. It also helps foods to maintain their original texture.
A fully cooked freezer meal (meaning a soup, casserole, or skillet dish that has already been cooked before it has been frozen) will typically take a full 24-48 hours to completely thaw. For meats that have not been cooked prior to your serving day, each pound can take up to 24 hours to completely thaw.
When you thaw in the refrigerator, you may wish to place your freezer meal atop a kitchen towel, into a bowl or baking pan, just in case the bag begins to leak or simply to catch condensation.
-
Cold Water Thaw
If your meal is sealed in an airtight container (freezer bag, sealed plastic container, or mason jar), you can safely place the food into a sink or bucket full of COLD water to thaw it. Be sure that the food is submerged. You will want to check on the food every 30 minutes or so to make sure that the water is still cold.
If the water becomes warm, then you are in danger of bacteria growing and you will need to drain and add more cold water. This method is a lot faster than the refrigerator. A pound of meat can be thawed in approximately one hour. This works great for main dishes like marinated meat, sauces, and soups.

Which Thawing Methods are not safe?
There are a lot of ways to thaw a meal, but not all of them are safe. The bottom line is this: bacteria do not grow on frozen food, BUT as soon as the temperature reaches 40 degrees, it comes out of hibernation and can start multiplying again. Gross right? This is why we do not usually recommend thawing your freezer meals on the counter or running them under hot water.
If the food item is something that can normally be stored at room temperature, such as baked goods (bread, muffins, pastries, etc.) or produce, then you can safely allow them to rest on the counter until thawed. However, any other foods should be treated the same way you would treat them when you bring them home from the grocery store. Meat, eggs, dairy, and dishes containing these items (even cooked dishes) should not be left out.
Thaw Your Meals Quickly
We’ve all done it. Some days, no matter how hard you try, you still forget to prep and you come home to a brick of frozen food. How do you get freezer meals thawed quickly so that you can still eat without calling for pizza?
-
Microwave Thaw
*Just a reminder that this will work only for meals stored in plastic or glass. DO NOT place foil baking pans or anything covered in aluminum foil into the microwave!
This handy kitchen appliance is by far the fastest way to thaw food, but you probably also know from experience that it isn’t always the best way. Foods can start to cook around the outside but remain cold or even frozen still in the middle. Things can end up with a weird texture from thawing too quickly or with a funny taste from the plastic container. We like to avoid the microwave, although we do often recommend it for reheating meals that have been cooked and frozen on cooking day. One exception here is if you have a dish that has been portioned out into single servings. These smaller portions can typically be quickly and easily thawed just like your freezer aisle favorites. Since they are smaller, they tend to thaw more evenly. Individual portions of baked goods (i.e. muffins) also thaw quickly in the microwave with little to no effect on the taste. All that said, if you have to get dinner on the table quickly, the microwave is probably the way to go.
-
Don’t Thaw! Cook From Frozen!
Yes, don’t thaw. It sounds contradictory, but it can work. You won’t want to do this with a meal that requires cooking or preparation on serving day. For example, you can’t put frozen food in the slow cooker as the temperatures are not high enough to keep bacteria from growing. However, some foods such as soups and casseroles can be cooked or reheated from their frozen state.
If you are using this method, you can expect to add about 50% of the indicated cooking time. For example, if your casserole was supposed to bake for 1 hour, it will take about 1.5 hours to cook from a frozen state. Note, that you will want to allow glass containers to sit at room temperature before you place them in the oven as they can shatter when there is a drastic temperature change.
Please Note:
We realize that there are several other ways to thaw meals. We have all experimented in our own kitchens and broken the rules a little bit to get dinner on the table. Of course, you are free to thaw at your own risk in your own kitchen. But these methods are the only ones that are approved as thoroughly safe.
We wanted to give you the best and safest methods available, even if they take a little bit more time and planning beforehand. With that, let’s move into some ways to help you make sure that you can have your meals and your schedule organized so that you have time to thaw safely.
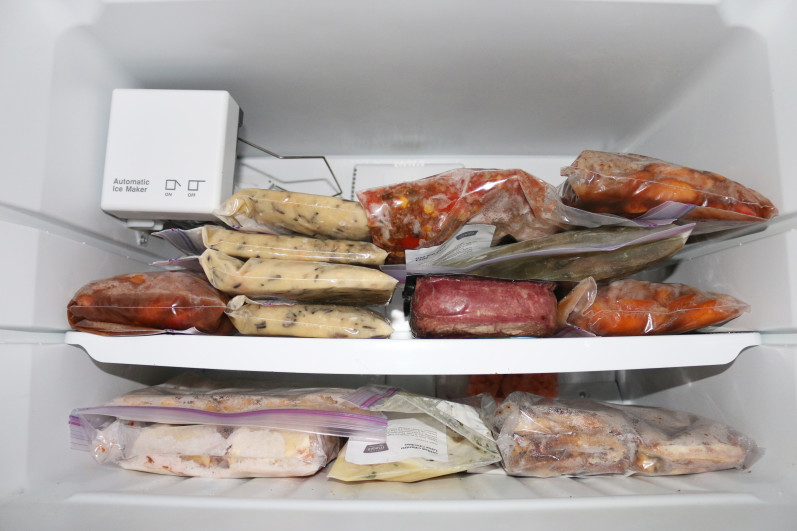
Inventory Your Freezer Meals
The first step in keeping your meals organized and your schedule running smoothly is to keep a freezer inventory. This is especially helpful if you have a large chest freezer in which things can get lost down in the depths. In a packed freezer, it is helpful to keep a piece of paper taped on the lid or door of your freezer and a pen handy so that you can add items to the list right away when you add them to the freezer.
Make several columns so that you can keep track of the food item or meal, the date frozen, the date it should be used by, and a column where you can put a checkmark when you have removed the item from the freezer. You will also want to make sure that each package is labeled with the same name and dates so that you can make sure that you are checking off the right boxes.
One of our members, Cathy, shared with us how she filled a freezer for her daughter to take to college and sent along a similar inventory list with notes about thawing and reheating.

Using Your Thaw Sheet
Another easy way to keep track of OAMM freezer meals is to use our Thaw Sheet as your inventory list!
The Thaw Sheet is one of our meal plan resources that contains a list of all of the meals from your meal plan (even custom meal plans), thaw instructions, cooking time, and cooking type. You can write the date of your cooking day at the top of the page so that you can use up older meals first.
Just remember that each recipe is doubled, so make sure you know what system you will use to indicate that you have eaten one portion and have another portion left.
PRO TIP: Tape this to your fridge or freezer, and track what you have!
I’d recommend writing in 1 and 2 next to each item, and then crossing out the numbers when you pull that portion. You can also just add 2 dashes next to each meal and cross those off as you go. Remember, each of our meal plans also comes with custom labels for your food giving detailed thawing and reheating/cooking instructions and a space for the date.
Plan to Eat Your Meals
Now that you know what is actually in your freezer, you can easily meal plan from your inventory list!
Pull Out Your Calendar
Once you have your list of meals in hand, pull out your calendar. Use paper and pen or a digital calendar – whatever you like best – but make sure you use the calendar that contains all of your other obligations on it. You don’t want to plan a big roast in the slow cooker only to remember last minute that you had made plans with friends or your kids have soccer.
Look at Your Obligations
Take a look at your obligations for the week (or month) and take a look at your Thaw Sheet or inventory. You will probably find that some meals are easier (i.e. slow cooker recipes or recipes that are cooked and ready to go) and others will require some type of cooking (baking, grilling, or stovetop) on the serving day. Go ahead and pick the meal that suits your schedule for that day. For example, you might want to choose a slow cooker recipe on a day when you know you will be gone all day and have little time to prep dinner when you get home, and then save the grilling recipe for a lazy weekend day.
Again, if you know you have a batch of muffins in the freezer, you will want to plan to eat them on a day when you have to be up and out the door early, and maybe you will save your breakfast casserole for your Sunday brunch.
If you use the pen and paper method, don’t forget to write in reminders for pulling food from the freezer. If you are using a digital calendar such as iCalendar or Google Calendar, it is super easy to set a reminder when you schedule the meal.
One of our members, Katharine, suggested this idea, and I think it is brilliant, especially since you can share Google calendars with a spouse or roommate (even older kids!) and everyone gets a reminder of what is on the meal plan and can help with thawing as needed. Remember, you need to pull the meal from the freezer 24-48 hours before you want to serve it, so set your reminders accordingly.
Pull Out Your Freezer Meals for the Week!
Since meals will often take a day or two to thaw, one method I like to use is to plan the meals that I will need in the next 3-5 days and pull them out all at once to slow thaw in the fridge. There are a lot of different ways to make these systems work for your family or you can come up with your own system that works with your schedule. The key is just to take a few minutes at the beginning of the week or month and decide how you will use your freezer meals in your meal plan to make your life simpler.
We hope this post helps you in the next step of your big Once A Month Meals cooking day, enjoying your meals, and your extra time!
8 Comments
Join the discussionWhy is my homemade tv dinner watery? I froze a container with a casserole, and a side of green beans. Put the frozen dish in microwave 3 mins on 1/2 power and 3 mins on full power. The beans were swimming in water. Help.
Hi Cindy! If you could, reach out to us at Info@onceamonthmeals.com with the Once A Month Meal’s recipe you made so we can be of further assistance!
Well, I was thinking of joining, but then I read your idiotic statement that you can’t put frozen foods in a slow cooker.
Thank you for your feedback. We follow the USDA’s recommendations for food safety when it comes to cooking frozen food due to the risk of food-borne illness.
Is it safe to eat TV dinners that were thawed out when freezer was left ajar all night?
Hi Mary,
Bacteria grow most rapidly in the range of temperatures between 40 °F and 140 °F, doubling in number in as little as 20 minutes. This range of temperatures is often called the “Danger Zone.” If you feel confident that your dinners did not reach this temp, then you may be able to eat them. Unfortunately we cannot guarantee that they are going to be okay to eat though. For more information, here is the link to the USDA’s recommendations about frozen food.
https://www.fsis.usda.gov/wps/portal/fsis/topics/food-safety-education/get-answers/food-safety-fact-sheets/safe-food-handling/danger-zone-40-f-140-f/CT_Index
I am trying to reduce the histamine in my diet and my nutritionist recommended freezing leftovers instead of refrigerating. I am nervous about the amount of time it will take to thaw in the microwave on my lunch break. I am a teacher so I only have a 30 minutes lunch. Also, I am afraid the taste will not be as good (too dry, overcooked, etc.). Any feedback or tips? I am thinking about investing in a FoodSaver to help with this switch over.
Thank you for your help 🙂
Yes, we have some great tips about reheating! It’s hard to give advice about reheating – because it is very specific depending on what you are reheating. Instant Pot’s are great for reheating. A mini (2 qt) would be a great size to reheat for yourself and it helps the food to reheat and taste good reheated.
We also have great low-histamine recipes on our site that you can check for using that tag to filter. Don’t get discouraged – there are lots of options!