![]()
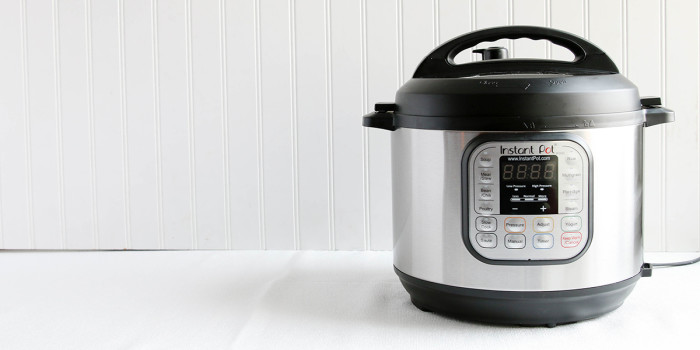
You’ve got your Instant Pot – the new holy grail of kitchen appliances – you found the perfect recipe, and you’re ready to get started!
But wait…
There’s trouble on your way to Instant Pot Paradise…
The recipe serves 4 and you only want to serve 2 – or you actually want to serve 6. And it’s for boneless chicken, and your chicken is bone-in! Will either of these things affect your cooking time? How in the world do you know whether to decrease or increase your time?
Well maybe you followed the directions and it was a total flop! Undercooked, overcooked, burnt, tough, raw, etc. We all HATE those scenarios, especially at the witching hour of dinner time, but friends it does happen!
Lucky, for you, we’ve created this handy little guide to keep you on your way to getting dinner on the table in a jiff!!
The Learning Curve
The most important thing to remember is that the majority of us are on a learning curve with the Instant Pot, but we’re all in this together!
Remember, take stock of the plethora of wonderful resources available to you, be patient, and take notes so you remember what works and what doesn’t work! If you’re making adjustments on a Once a Month Meals recipe, we’d love to hear your constructive feedback on what worked and what didn’t work! Contact us at triciac@onceamonthmeals.com with your adjustments!
Additional Instant Pot Resources:
- Instant Pot Tips and Tricks 101: Our best tips for Instant Pot recipes!
- What is an Instant Pot? (Includes a Buyers Guide!)
- 4 Ways to Transform Your Freezer Cooking with an Instant Pot
- Crock-Pot VS Instant Pot: Pros, Cons, Recipes, Videos & more!
- Pot-in-Pot Method: Learn what and how this method works!
- 50 Instant Pot Freezer Meals: 50 Meals to cook from frozen!
- 101 Instant Pot Freezer Meals: 101 MORE meals to cook from frozen!

Things to Note within Instant Pot Recipes:
Variables that will affect your cooking time:
Serving Size
Is your recipe for 2 or for 8? Depending on the amount, it’s going to require more or less time. For our Once A Month Meals recipes specifically, everything is based on 4 servings. So you will need to adjust accordingly for larger or smaller servings.
Meal Type
Is the recipe for a soup or stew? Is it for a single piece of meat such as a whole chicken or pork roast? Is it an all-in-one recipe with your main protein and a vegetable all together? Depending on what you are cooking, the times and settings will need to be adjusted.
Container Size
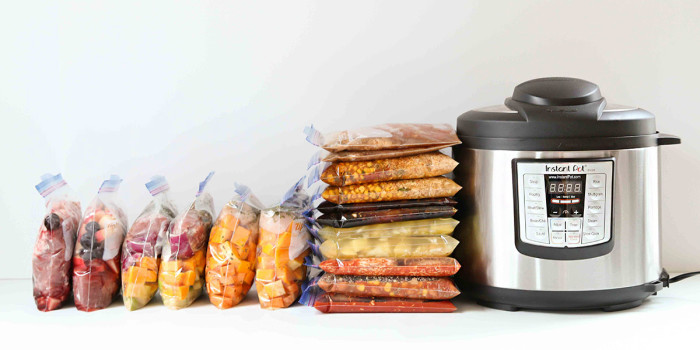
You can freeze Instant Pot Meals in round containers, in freezer bags, in glass containers, containers lined with bags, and more! But how you freeze those meals impacts how quickly or slowly they cook!
Portion Size
Are you cooking a whole chicken? Maybe cubed meat? Chicken strips versus chicken breasts? Depending on how large your meat portion is, the cooking time will need to be adjusted. For example, a 3 lb pork roast cooked as one large piece, versus being cooked as 3 cut-up chunks will cook differently. So take into account how it’s portioned!
From Frozen or from Thawed
Are you cooking your meal from a frozen or thawed state? Is the whole thing one large frozen chunk or thawed cut up pieces? Either way, this will obviously play a large role in adjusting your cooking times!
Pressure Release
Make a note of whether the recipe calls for a quick release (immediate releasing of the pressure) or a natural release (a slow-releasing of pressure). This could be the difference of 20 minutes or more in some cases, so be on the lookout!
Pressure Cooking
It is a pressure cooker, so it’s going to cook everything WAY faster than you are accustomed to. So know, it is very easy to overcook in the pressure cooker. Be sure to try out lower times than you think you need. You’ll be surprised how quickly it will cook. If the item is indeed undercooked, simply add in a few more minutes!
Our Tips for Adjusting Instant Pot Recipes
Adjusting your Serving Size:
If you adjust your serving size, you will need to either increase or decrease your cooking times.
Below are some of our recommendations for times based on servings.
Average Cooking Times*
- 1-2 Servings: 5-10 minutes
- 3-4 Servings: 10-20 minutes
- 5-6 Servings: 15-25 minutes
- 7-8 Servings: 25-35 minutes
To increase your serving size for every 2 servings add 2 – 5 minutes
To decrease your serving size for every 2 servings subtract 2 – 5 minutes.
* Remember, these are recommendations, so adjust as you cook and learn!
These times are the same whether you cook from fresh/thawed AND frozen.
Why is that? Because we take into account the amount of time it takes the Pot to come to pressure. The Instant Pot will take much longer to come to pressure for the frozen meal than it will for the fresh/thawed version. So while it will only take say 15 minutes to cook, it might take the frozen version 20 minutes to come to pressure, while the fresh/thawed version only takes 5 minutes to come to pressure. So remember that variable when you are trying to have your meal done in time for dinner (when utilizing the Once A Month Meals thaw sheets, these lengthened pressure building times are factored into the quoted time needed for the meal on the serving day).
Meal Type Variables:
- Whole Meats: whole chickens, roasts, loins, etc.
- Soups and Stews: meat/vegetables/starches submerged in liquid
- Whole Meals: meat & vegetable/starch combinations
 A Pro Tip: Consider using a trivet!
If you are cooking a whole pork roast, chicken, or maybe a frozen block of a meal, consider placing it on the trivet that came with your Instant Pot! Placing the item on top of the trivet will help your meal cook faster because the warm air and pressure can circulate around the meal. It can many times help reduce your cooking time! If you have don’t have -+
+————————————————————————————————————————————————————————————————————————————————————————–one or are using another type of electric pressure cooker that didn’t come with one, we highly recommend you get one! It has a lot of uses!
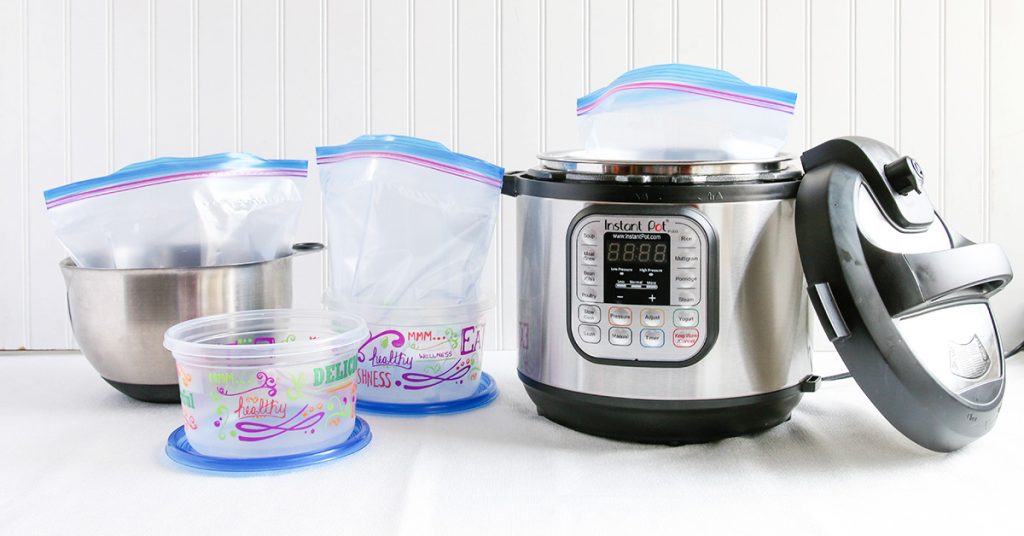
Adjusting your Container Size:
If you adjust your serving size, you will also need to adjust your container size! You can use plastic containers, freezer bags, glass containers, and more! Below are some of our recommendations for containers based on the number of servings to get you started!
- 2-3 Servings: 52 oz containers / Quart or Gallon Freezer Bag(s)
Great for a 3 qt Instant Pot! - 3-4 Servings: 64 oz containers / Gallon Freezer Bag(s)
Easy fit for 6 qt Instant Pot! - 4-6 Servings: 72 oz containers / Gallon Freezer Bag(s)
This one is our favorite for the 6qt Instant Pot! - 8-10 Servings:128 oz containers / Gallon Freezer Bag(s)
Perfect for the 8 qt Instant Pot!
**Due to inventory in this current season, prices and availability may vary. We will do our best to keep these links updated and get you the best options and prices available!
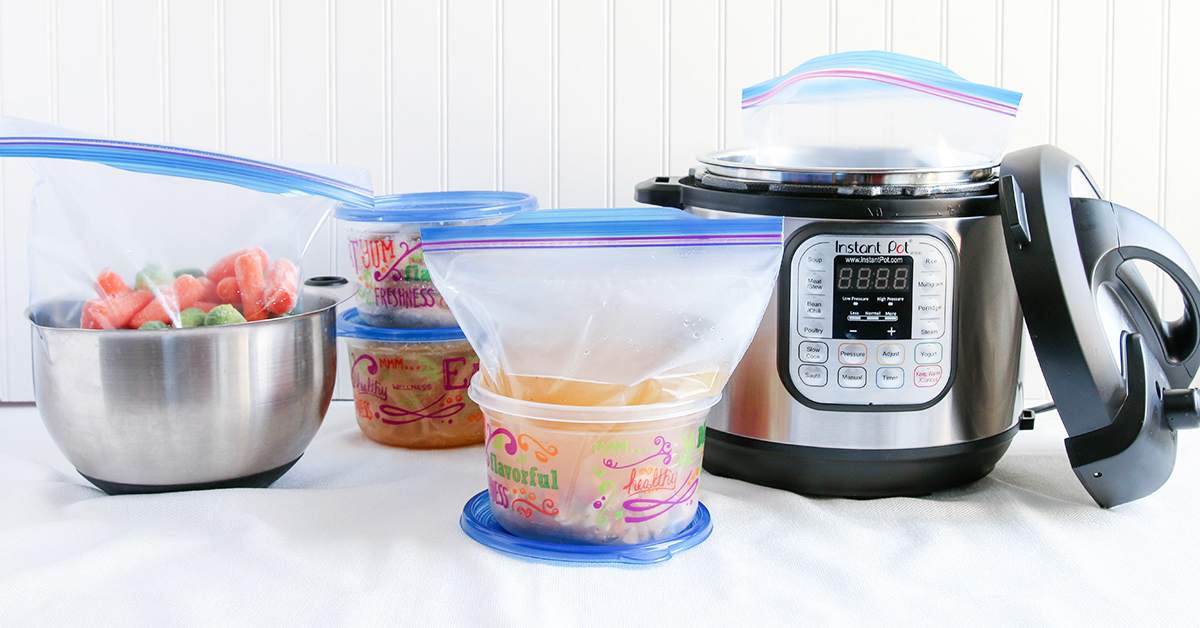
Meals frozen in round containers fit in the Instant Pot the best from our experience!

Changing the Type of Meat:
Check page 34 of your Instant Pot Cookbook and Cooking Timetable for all ingredient cooking time recommendations. Those times should give you a rough estimate of the conversions you’ll need to make in your recipe.
Some examples:
You want to substitute chicken thighs for chicken breasts for 4 servings. The manual says “Chicken, breasts: 8 – 10 minutes” and “Chicken, cut up with bones: 10 – 15 minutes.” We might meet in the middle of those two recommendations and try 10 minutes, depending on the recipe and its other ingredients.
The same idea goes for “Beef, pot roast, steak, rump, round, chuck, blade or brisket, large: 35 – 40 minutes” and “Beef, pot roast, steak, rump, round, chuck, blade or brisket, small chunks: 25 – 30 minutes”. If you are cooking for 4 servings and going from a whole roast to 4 cut up pieces of that roast, we might try 25 minutes to start.
And again, if something comes out overcooked or undercooked, make a note in your manual of the adjustment you had to make. Then you will remember your adjustment the next time you go to make that recipe!
Substituting Bone-in and Boneless Meats:
Again, your Instant Pot Cookbook and Cooking Timetable will have several recommendations for you about bone-in or boneless, but a good rule of thumb:
Bone-in requires more time, while boneless requires less time. Typically, you can add or reduce about 2-5 minutes in time for that substitution.
Adjusting Meat Portions
When you are cooking meals that call for a whole chicken, a 5 lb pork loin, a 4 lb beef roast, and so on, they will definitely take more time to cook. However, when you cook one of those items from frozen, you run the risk of cooking the outside, but not fully cooking the inside.
To mitigate cutting into a raw, cold center, we highly recommend cutting up and reapportioning your meat! So take that 5 lb pork loin and cut it up into 4 smaller pieces. Cut the 4 lb beef roast in half or breakdown the whole chicken a little bit. Whatever large cut of meat you have, if you are planning on cooking it from frozen, we highly recommend that you cut it up and break it down.
Suggested Cooking Times (For default serving size of 4)
- Chicken, bone-in (cut into smaller pieces): 10 – 15 minutes
- Chicken, boneless breasts: 8 – 10 minutes
- Chicken, whole: 20 – 25 minutes
- Beef, Pot Roast, Steak, Brisket, large: 35 – 40 minutes
- Beef, Pot Roast, Steak, Brisket, small: 25 – 30 minutes
- Pork, loin roast: 55 – 60 minutes
- Pork, ribs: 20 – 25 minutes
- Turkey, breast, boneless: 15 – 20 minutes
- Turkey, breast, bone-in: 25 – 30 minutes
Again, please remember the multiple variables above that could affect your cooking times. These are straightforward cooking times, for a serving size of 4.
Cooking from thawed instead of from frozen:
Be sure you have enough liquid.
When you are cooking from thawed, you need to be sure you have at least a ¼ cup to a full cup of liquid to get your Instant Pot to pressure. You can usually skip this step with frozen meals since it will literally meltdown, creating the liquid you need for you! (See next step for more details)
The liquid does not have to be “water”: In order for the Instant Pot to come to pressure, it usually needs liquid to get there. However, it doesn’t HAVE to be water! It can be your meals sauce, marinade, and so on! It just needs a type of liquid to get to pressure!
Remember, it’s easy to overcook in the pressure cooker, so be sure to try out some lower times! You’ll be surprised how well it will still work!
Cooking from frozen instead of from thawed:
Divide up your meat.
If you are preparing a meal for the freezer, and you know you will want to cook it frozen, we recommend that you cut up your meat into small portions. For instance, take that 3lb pork roast and quarter it into 4 individual pieces. This will help your meat cook faster from a frozen state.
Account for “Coming to Pressure” time.
As we mentioned under “Adjusting your Serving Size,” take into account the extra time it will take your Instant Pot to come to pressure with a frozen meal inside! This could take up to 20 minutes in some cases, so be sure to remember that when you are preparing!
Be sure you have enough liquid.
Saute for 5 minutes to generate liquid: When you cook an item from frozen, be sure to saute it for 5 minutes to release some of the frozen water and liquid. This will generate the liquid you need for the Instant Pot to come to pressure, without adding unnecessary liquid, diluting your meal.
Add Your Own: If, however, you don’t think you have enough liquid, add it! Many times in our Once A Month Meals recipes, we save a portion of the liquid to be put in on the serving day to also help with this.
The liquid doesn’t have to be “water”: In order for the Instant Pot to come to pressure, it usually needs liquid to get there. However, it doesn’t HAVE to be water! It can be your meals sauce, marinade, and so on! It just needs a type of liquid to get to pressure!
Quick Pressure Release versus Natural Pressure Release:
Quick Pressure Release (QPR or QR)
This means you are immediately releasing the pressure. This is a great option if you are in a rush or if you simply cooked the meal thoroughly with the cooking time. Overall, this option helps you get dinner on the table faster.
Natural Pressure Release (NPR or NR)
This means you are slowly releasing the pressure. You can decide to NPR if you would like your recipe to cook for longer. Just know cooking does not stop at this step. Also remember, this could add a lot of time to your total cooking time, typically 20 minutes or more for full pot meals. Therefore, prepare to wait as this will cause your recipe to take longer!
Overheating and Burning
When the “OvHt” for “Overheating” or “Burn” messages appear on your Instant Pot screen…
Disclaimer:
For Once A Month Meals Recipes:
These are the disclaimers put on ALL Once A Month Meals Instant Pot Recipes —
Make it Now Cooking Directions
**Due to the nature of pressure cooking there is always room for inconsistency. The times given here are based on 4 servings fresh. If you are using more servings you may need to increase your cooking time.**
Freeze For Later Serving Day Directions
**Due to the nature of pressure cooking there is always room for inconsistency. The times given are based on 4 servings frozen using 64+ ounce round containers. If you are using a different size/shape container or more servings you may need to increase your cooking time.**
Time Adjustments
Because of the many variables and outliers that occur in freezer cooking and in pressure cooking, please note that all times given are our best recommendations for you based on our testing. If your meal still needs more time, or the internal temperature of your meat still isn’t as high as you’d like it to be, simply add more time! 2 minutes, 5 minutes, 10 minutes, whatever you think! Just adjust as you see it needs.
Non-Instant PotⓇ Programmable Pressure Cookers
All Once A Month Meals Instant Pot recipes have been tested in an Instant PotⓇ Multi-Functional Programmable Pressure Cooker. All recipes can easily be made in other non-Instant Pot programmable pressure cookers following our directions. We most often use the Manual setting, which all Programmable Pressure Cookers have. However, if you do see a variance, just note the differences in your settings as well as overall cooking times in your brand-specific manual.
More Instant Pot resources:

![]()


Instant Pot friendly recipes and meal plans!
Get Instant Pot Recipes Instant Pot Meal Plans
You can cook the meal plan as is, or you can build your own custom meal plan with your Membership.
“Burn” shows up when something has burned and scorched the bottom of the pot due to an insufficient amount of liquid required to come to pressure. Your meal usually won’t come to pressure in it’s current condition.
Ways to Remedy Burning: